Some good work this week, working a few week nights and the weekend. The aim now is to get suspension, steering and diff in to see what space issues we're going to have with the Saab and engine and Vauxhall gearbox.. We'll have to remove front suspension to get side panels on.
1st job, tidy up the rough edges of the insert tubes, redrill the insides (I think) with a 10mm drill bit. Clamped in a vice with a couple of pieces of wood to protect the tubes.
We then tried to get them into the wishbone bushes but the hole was way too tight. So, a 14mm drill bit run through the middle of the bushes did the trick. Tubes were still a tight fit but lightly copper-greased went in ok.
After that, wishbones were attached to the chassis with the supplies hi-tensile bolts washers and nuts. Then the shocks were fitted.
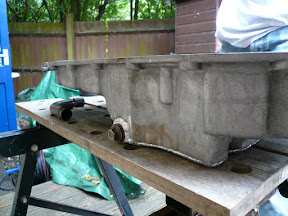
Next up, Diff was fitted. We lifted the diff upwards roughly in its fitted position to allow the middle of the bolts to be fitted into the slots. This allowed us to look through the badly pre-drilled chassis holes and mark on with a Tip-Ex pen where to Dremel out to see the diff holes. Several hours later and the front and upper mounting holes were done.
Note the washers used to centralise the diff. We did this by lining it up roughly central between the front 2 mountings which looked pretty square to the chassis, then selecting the correct number of washers to fill the gaps between diff and chassis brackets.
The rear mount was to far away from the rear mount plate so we'll have to get 10mm longer ones to reach.
On checking the diff flange, it isn't quite at 90deg to the chassis rails. I wanted to fix this but Mike reckons the prop joints will be fine with it..! We'll see.
Driveshafts next, we had some 'issues' getting everything lines up as the hub bolt pattern is not square but only by a small amount making it difficult to keep everything the right orientation. The 4 spacer plates each side need the holes redrilling for 11mm to get it all to fit. Marker pen lines to help us remember!
Brake back plates, these are handed and should go with cylinder at front, handbrake entry from the top. No bolts with the kit so needed to buy M10x40 8.8 grade bolts and nyloc nuts to bolt everything up.
Front hubs next, the bores for the wing-stay/ball joint adaptor had a quick sand to remove surface rust and the same to the wing-stay to reduce the thickness of powder coating slightly. Then with the aid of a chisel to spread the clamp the stays dropped in.
Aligned as shown.
Then bolted to the balljoints (not fully).
Sierra master cylinder and steering column dropped in place, and steering rack loosely bolted in. Annoyingly GBS give you balljonts, a new rack, but no track rod ends... back to ebay for those.
All bolts so far have come with the kit, been bought from Screwfix or B&Q, and specialist ones like the bolts that appear to be 3/8" that pinch the hub up are from places like www.Namrick.co.uk
Now ready to put drum, discs and wheels on so we can see how engine, brake/fuel lines and loom can fit in.
Published with Blogger-droid v1.5.9